

YOUR SPOILER CUTOFF
Spoilers for Books 1–8
Select the last book you finished to hide later spoilers.
All eight books included
World Dungeon · Floor 8
Floor 8
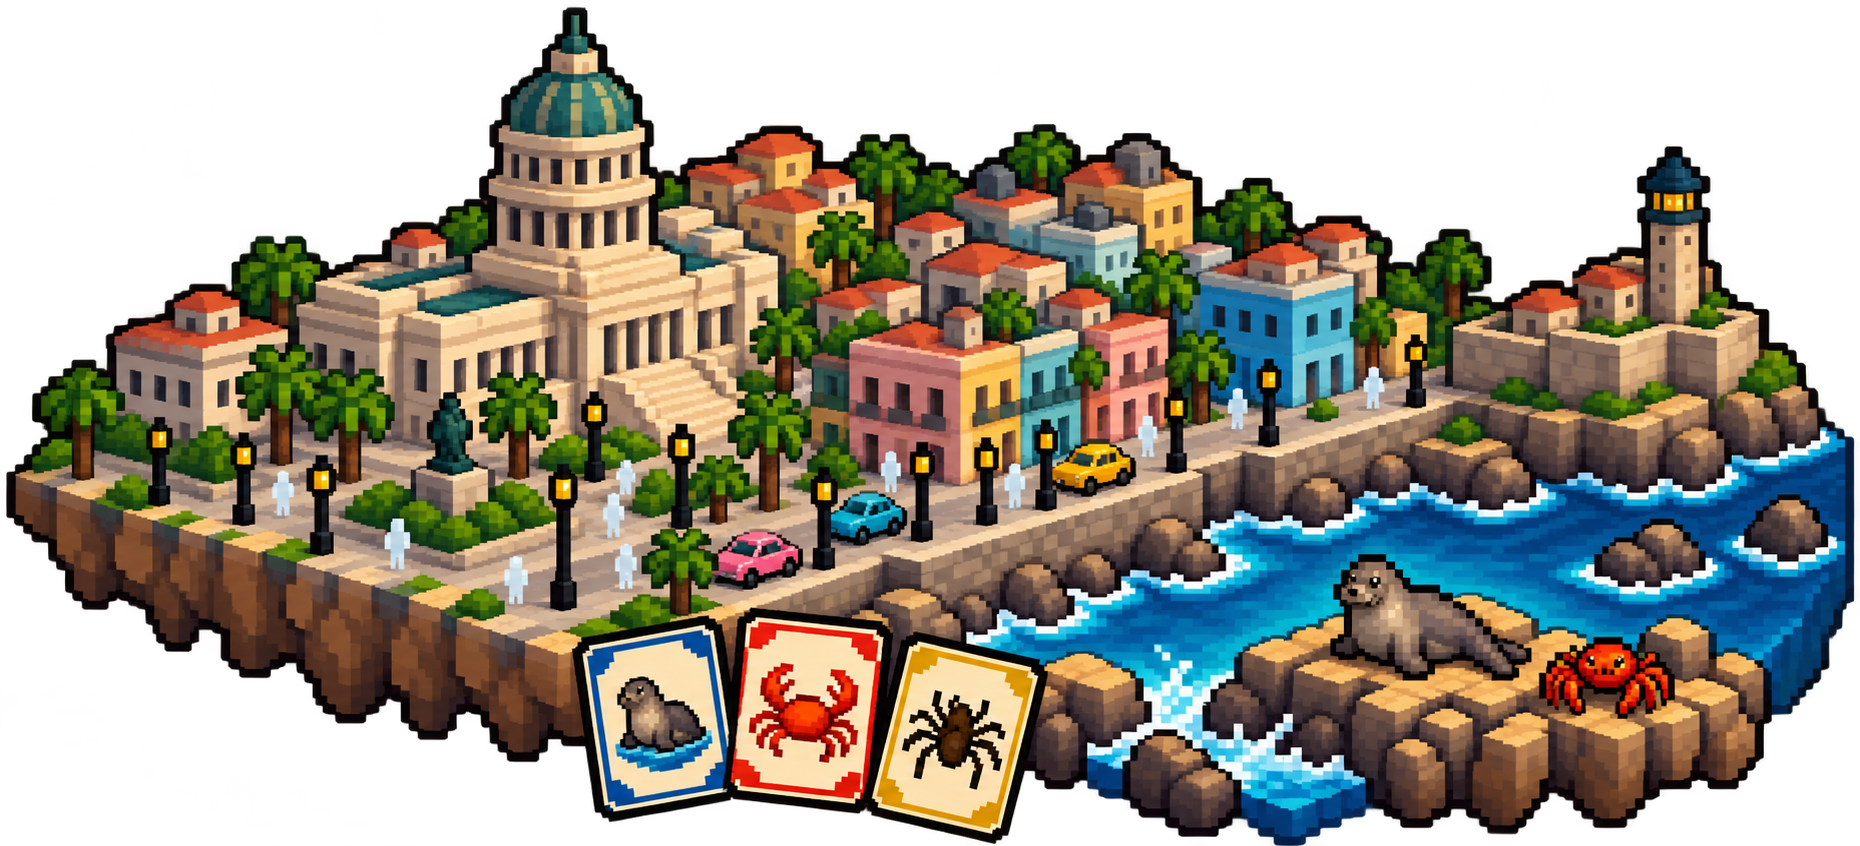
The Ghosts of Earth is Floor Eight, a reconstruction of places the crawlers once called home. Carl and Donut must capture creatures, build a deck and win real-time card battles to secure their way out. As the floor progresses, its shifting rules turn scarce exit keys into another reason for crawlers to fight each other.[1]
Choose Book 6 or later above to read this section.
Rules and navigation
The floor opens with twenty-one days remaining. Squads capture creatures for their card decks, then compete for exit keys in later phases. Even a team with a key can lose its way out if the entrance is destroyed.[2]
Choose Book 6 or later above to read this section.
Setting
Carl and Donut arrive at a reconstructed El Capitolio in Havana. The floor recreates places from Earth but restricts travel between regions and assigns squads particular exits.[3]
Choose Book 6 or later above to read this section.
Quests and threats
The party encounters a sealed cemetery, rival shrines and a daily spider-hunting quest. Captured creatures fight as totems, though powerful beings such as Shi Maria retain dangerous ambitions of their own.[4]
Choose Book 6 or later above to read this section.
History
Book 6
The Eye of the Bedlam Bride
Arrival after the Great Race
The crawlers arrive after Prepotente destroys the Great Race. Mordecai believes its fairy-tale design and Prepotente’s sponsor gifts made the shortcut possible. The system rewards them for descending in under an hour and clearing a floor without kills, despite never running the intended race.[5]
Earth’s reconstructed regions
The floor has 293 regions, of which 205 are occupied, and two stairwells in each. During the first phase, crawlers normally cannot travel more than 99 kilometers within their region; islands also have a six-kilometer offshore boundary. Carl and Donut arrive in Havana, having believed they selected Florida.
The people replayed in these locations are intangible and do not appear on the map. Real animals and NPCs register on Ping. Loose nonbiological objects can be moved or collected, disrupting the ghost traffic and causing collisions through the streets. The setting resets each day, and items taken from Earth’s reconstruction will vanish when the floor collapses.
The dungeon also recreates places tied to individual crawlers, including Imani’s mother’s home and Carl’s father’s trailer. These encounters exploit their memories without telling them what happened to the real people depicted.[3]
Pueblo de los Olvidados
Entering Colón Cemetery traps the party in Pueblo de los Olvidados. Its ghommid inhabitants have been driven mad by sickness. The quest requires the party to remove its source, restoring or killing the residents before they can claim the town and receive a Silver Quest Box. Carl also notices that the AI’s remarks about quarantine and enhancement zones disappear when he copies the message, so he records them from memory.
The level-130 figure chasing them is Asojano, an Orisha of disease and healing. He says his damaged shrine traps him in the cemetery and worsens the ghommids’ sickness. Repairing it offers a way to save the inhabitants without killing him. The party eventually cures the town by restoring another shrine, but Carl’s separate SlugPox infection remains.[6]
The seven Orisha shrines
Seven ruined Orisha shrines surround a single Sun of Reawakening in the temple. Asojano wants his shrine restored, while Ogun demands that his worshippers Paz and Anton choose him. During a pause in a celestial thorn room, Ogun, Legba, Shango, Oshun, Asojano, Inle and Yemaya each offer rewards. The party can restore only one shrine.
Katia urges Carl to choose Yemaya because of a crown problem she has not yet explained. When fighting resumes and an Ogun piece is knocked away, Ines places the Sun in Yemaya’s shrine. Yemaya reascends, curing the settlement, and Carl captures the weakened Asojano. Ogun punishes Paz and Anton by Shunning them; his later intervention kills Anton and mortally wounds Paz. Ines captures Paz before he dies.
Yemaya rewards the squads with cards, including Donut’s reusable Thief mystic. Eileithyia, her patron, grants Carl’s party protection against possession and small healing and Constitution benefits for the rest of the floor, though she retains the power to revoke them.[7]
The Spiders quest and Huanxin’s bargain
Eileithyia gives the party a quest to kill five spiders each day. Privately, her sponsor Huanxin Jinx explains that it provides cover for contacting and rewarding Carl. She demands that he take Odette as his Faction Wars adjutant and remove the crawlers’ safety protections on Floor Nine. She threatens his friends and uses Katia’s crown crisis to pressure him.
The party meets its daily quota while traveling south. At the start of phase two, the quest completes and offers a boon at an Eileithyia temple. Huanxin accepts that Odette’s withdrawal was outside Carl’s control and promises to honor her bargain, while threatening Katia and Donut if she discovers they conspired against her. Carl has yet to collect the temple reward.[8]
Katia’s orchid and Astrid’s assassination
Katia reveals that a separate celestial orchid could release her from the crown’s trap. After an hour unconscious at one percent health without healing, it offers three choices: a large Constitution increase lasting no later than Floor Twelve, immediate transfer there as a noncombatant Celestial Attendant, or pregnancy and removal to a surface Kinder Facility under the child-protection rules. Katia favors becoming an attendant. To obtain the flower, however, she must break three seals, including a Guild of Suffering contract to assassinate Astrid.
With Carl’s help, Katia kills Astrid during the Desperado Club demon emergency. Astrid had tried to protect Carl and asked him to care for her family. Katia turns in the body and claims the orchid, but delays using it so she can stay with her squad through the floor. Huanxin continues tying further help to Carl’s choice of adjutant.[9]
The Chowder War gives way to a survival quest
The Chowder War offers a Platinum Quest Box for siding with either monk seals or red land crabs. Each accuses the other of threatening its young or habitat, though Carl’s Cuban companions question the AI’s ecological account. The party captures the seal Yago without choosing a faction. A mass crab migration and Ines’s warning to the Monk Seal Abbot worsen the conflict, while Carl captures Raul separately.
When Carl returns toward the coast, seals, crabs, zombies and a snake carrying Ines have joined the battle. The Chowder War fails and is replaced by Hell Comes to Crawler Town: reach the stairs without being dragged into Sheol, for a Legendary Quest Box, hat and bagpipes. Demon Eviction lets demons inhabit recently fallen or weakened bodies and seize nearby people, making escape urgent.[10]
Carl’s duties to Emberus
Carl’s duties to Emberus continue alongside the card game. Pater Coal helps him obtain emergency SlugPox treatment and discuss Geryun’s murder. The leads include Orthrus’s unreliable memories, Hellik and Apito, a strange memorial shrine, Katia’s crossbow and Donut’s bracelet. Emberus later sends him to question a Nekhebit priestess about her grudge against Apito.
Surviving the hydra’s fire earns Carl a promotion, temporary access to Self-Immolation and a higher ten-percent tithe. He remains vulnerable to direct fire and lava. Later, Martyr’s Path activates when his health falls below five percent. The Scavenger’s Daughter turns its flames into Sheol fire, which helps power Amayon’s spell.[11]
Capture flags and card-battle rules
Each squad starts with twenty capture flags and six monster slots in addition to its crawlers. A target must be alive and below five percent health when someone pierces it with a flag held in their hand. Used or failed flags are lost. Destroying an unwanted totem frees its slot but does not restore the flag.
The G’hee deck uses totems to summon creatures, utilities to help allied monsters, snares to hinder enemy monsters, and mystics for spells and deck effects. Special cards add further options. A complete crawler deck has six totems, though fewer will activate it. Too many other cards make it harder to draw a creature when needed.
An opponent can force a squad into a card battle, locking its deck. The leader controls the hand but loses normal magic and inventory access until the deck is played or discarded. They can still move, fight physically and use equipped gear while their squad protects them. Carl also discovers that an enemy deckmaster cannot be attacked while one of that leader’s totems is active.
Battles unfold in real time with a normal hand of four cards. Replacement and discard timers govern play. The opening instructions promise seven-second replacements, but Carl later observes ten seconds, and some equipment or opponents alter the timing further.
A defeated totem normally returns to the deck after the encounter. Within a fight, utilities and snares can remain attached when a creature is summoned again. Some attacks and effects can permanently eliminate a totem, making it unsafe to rely on that usual recovery.[12]
Deck building and combinations
Carl and Donut test an eighteen-card deck to improve their chances of drawing the totems they need. A practice defeat shows how vulnerable they are when an opponent blocks their strongest summon. Other enemies can remove a crucial card for the rest of a fight.
Creatures also have limited utility slots: Geraldo accepts two and rejects a third. Donut combines Heyzoos and Asojano into Lazarus-A-Bang-Bang, boosts him and uses Glow-Up to preserve the result. The fusion frees a slot for Jola and offers a long summon duration, but its two utility slots replace the seven available between the original creatures.
Donut’s sailor hat reduces her draw cooldown by two seconds, though wearing it costs her the tiara’s Hover and Intelligence bonuses. The Champion Pack later lets the squad own eight totems while using only six in its active deck.[13]
Phase two sends the squad after a key
Phase two is scheduled for December 24. Leaders have sixty seconds to choose a destination, followed by forty-eight hours to acquire an exit key. Six active totems transfer with them, and random creatures from their original region fill any empty slots. Their other cards remain available.
The transfer malfunctions. Donut chooses Iowa, but the squad lands in the Florida Keys while its key remains marked in Iowa. The system moves the enormous mound containing the key’s location into Florida. Other squads experience mismatched destinations as the administrators struggle with the errors.
Carl and Donut must collect nine tokens to challenge their final key holder. Preliminary battles take place as the relocated terrain crumbles. At the final encounter, Carl recognizes his father’s trailer. Donut spends the tokens, starting a countdown they cannot cancel.
After winning the encounter, they take the key from the corpse. The dungeon has used Carl’s family history to construct the fight, leaving the fate of the real people unresolved.[14]
Phase three turns key scarcity into conflict
On December 26, keyholders return to their original regions. Squads without keys choose another destination and may arrive near a keyholder’s stairs. Cuba receives five squads but has only two keys. Each key is consumed when it opens a vestibule for its owner’s squad.
Flee can now cost a squad its exit. If it holds a key, retreat transfers one at random to the opponent; a keyless squad simply escapes. Voluntary trades outside combat are forbidden, while a victor facing several squads can win multiple keys.[15]
Quan’s victory and the loss of a doorway
Quan uses Peekaboo to read his opponents’ hands and Force Play to make Ines use Flee. He turns Donut’s hand into Flee cards and forces her retreat too, taking both keys. Donut recovers them after Quan dies, but one belongs to the damaged Capitol entrance and is about to disappear.
When that entrance closes, its key is destroyed. The surviving key opens Iglesia de Jesús de Miramar, where Ines threatens the doorway. Other squads report sealed chambers behind ruined entrances that resist both Hole and Phase Through Wall. Roughly three-quarters of squads lack keys.
The stair structures remain protected even when their entrances are lost. Carl begins planning to clear away the chambers around them, opening a route for crawlers who cannot use the doors.[16]
Carl’s plan for Amayon’s portal
Amayon starts creating an enormous portal while Ines struggles to control him. Carl wants its pull to reach every region. He and Prepotente ask squads to clear the structures and ground around their stair chambers, using Build Trench scrolls where possible. Carl warns them that the plan may fail.
Carl uses controlled pox slugs to meet demons’ soul requirements and send them back to Sheol. Clearing the church this way also uses souls needed for Amayon’s larger spell. Lucia supplies Tier 3 Doggie Door modules so allies can gather through shared personal spaces. Each module reaches same-floor exits its owner has already visited.
Louis kills Ines during the attack on the FOSCA building, drawing her goddess Ysalte into the fight. Carl sends an anchor-carrying automaton to Amayon’s snake shell, then teleports the shell away to expose the stronger demon within. Ysalte enslaves him. The Missing Piece quest gives the crawlers ten minutes to free Amayon and make him strong enough to cast his return spell.
Five squads face Ysalte and Amayon as invulnerable deckmasters. Amayon will try to flee only after losing all six totems. Donut steals one and forces his final card to be discarded. The crawlers then discover that the earlier demon evacuation has left too few suitable souls to fuel the spell.[17]
Freeing and empowering Amayon
Donut uses Midnight Express to make Carl deckmaster temporarily. He summons Raul on the beach while she regains her ordinary abilities. Because the AI counts each crab reproductive cell as a soul, Raul can replenish the supply in the ocean.
Carl activates Martyr’s Path, feeding Amayon with the Sheol fire produced by the Scavenger’s Daughter. Ysalte summons Paz, who joins Katia. She equips him and sends him at the goddess with an explosive arrow. Paz receives credit for Ysalte’s death, freeing Amayon before time expires. Katia later explains that she used the Bolt of Ophiotaurus on Paz’s equipment, though the exact means of overcoming the goddess’s invulnerability remains unclear.
Amayon still refuses to guarantee anyone’s safety. The crawlers must rely on the spell clearing the terrain as Carl expects and on their preparations beneath the stairs.[18]
Shi Maria’s fusion with Carl
The escape continues amid collapsing buildings and fighting. A demon drags Lazarus into Sheol, permanently eliminating him. Donut plays Golden Combo to fuse Shi Maria with Alpha Carl, but Shi Maria kills Alpha Carl before the fusion completes. The system substitutes Carl, giving Shi Maria control of his body and inventory.
Shi Maria tattoos the Eye of the Bedlam Bride onto Carl’s chest before the fusion ends and tells him that part of her will remain. Donut destroys the card afterward, but Carl still hears Shi Maria’s warning before he descends.[19]
The escape through the exposed stairs
Amayon’s empowered spell reaches the whole floor, pulling away living things, loose objects and buildings. The stairs remain protected. Crawlers must shelter beneath cleared vestibules so the chamber is stripped away above them, exposing a route down.
The shared-room network lets allies reach their assigned regional exits. Carl, Donut and Imani wait under the cleared church chamber in Cuba. Once the world overhead is pulled into Sheol, their quests complete and they descend the stairs to Faction Wars.
The regional assignment remains somewhat unclear. The final instructions refer to a crawler’s starting country, but Imani begins in New England, transfers to Cuba for phase three and successfully descends there.[20]
Choose Book 6 or later above to read this section.
Sources
References are to Matt Dinniman’s novels. Book links open our recap guides.
- The Eye of the Bedlam Bride, Chapter 1.
- The Eye of the Bedlam Bride, Chapters 1, 27, 52–53.
- The Eye of the Bedlam Bride, Chapters 1, 4, 40, 43–47.
- The Eye of the Bedlam Bride, Chapters 10–11, 14–17, 22, 38, 70–72.
- The Eye of the Bedlam Bride, Chapter 2.
- The Eye of the Bedlam Bride, Chapters 10–11, 15.
- The Eye of the Bedlam Bride, Chapters 14–17.
- The Eye of the Bedlam Bride, Chapters 17, 22, 38.
- The Eye of the Bedlam Bride, Chapters 19, 32–33.
- The Eye of the Bedlam Bride, Chapters 6, 24–25, 54.
- The Eye of the Bedlam Bride, Chapters 18, 38, 47, 69.
- The Eye of the Bedlam Bride, Chapters 1, 6–9, 11, 28–29.
- The Eye of the Bedlam Bride, Chapters 9, 28–30, 34, 38–39, 47.
- The Eye of the Bedlam Bride, Chapters 27, 38, 40–47.
- The Eye of the Bedlam Bride, Chapters 27, 52–53.
- The Eye of the Bedlam Bride, Chapters 56, 58–61.
- The Eye of the Bedlam Bride, Chapters 61–67.
- The Eye of the Bedlam Bride, Chapters 68–69, 72.
- The Eye of the Bedlam Bride, Chapters 70–72.
- The Eye of the Bedlam Bride, Chapters 1, 52, 63, 72.